Showing posts with label chipboards. Show all posts
Perfectly Imperfect – Colourful Blooms with Polkadoodles

Perfectly Imperfect – Colourful Blooms with Polkadoodles

 Hello my crafty friends,

Today I’m sharing another card made with the brand‑new Polkadoodles collection — full of colour, texture and positive vibes! For this design, I used the Lucky Dotty Flower Dies together with the Chicken Wire Texture Sheets (MDF) to create a vibrant, dimensional background.


The flowers are die‑cut and ink‑blended in cheerful rainbow tones - pinks, turquoise, yellows and purples - layered to add depth and movement. The textured MDF panel behind them gives a lovely rustic contrast to the soft petals.

I finished the card with a small sentiment strip “You’re perfectly imperfect” - because handmade art is all about embracing uniqueness and joy.

This project was pure fun to make - bright, bold and perfectly imperfect!

Natalia x

Chevron Love – Colour and Texture in the Spotlight

Chevron Love – Colour and Texture in the Spotlight

Hello everyone,

I hope you’re all doing well and finding a moment for something creative today.

This time, I played with the Chevron 2 x Layering Stencil Set from Polkadoodles. I absolutely love this pattern for its rhythm and endless colour possibilities. I used Distress Oxide inks to build the backgrounds. They blend beautifully and create such soft, dreamy transitions.


For the focal elements, I reached for two gorgeous sets: • Beautiful Anemone Flowers – Chipboard, Stencil and Stamps Set • Wild Sunshine Flowers – Chipboard, Stencil and Stamps Set

Both cards turned out bright, joyful and full of movement – perfect for sending a little sunshine to someone special.

Thank you so much for stopping by today. See you soon with more crafty inspiration!

Natalia x

Soft Layers & Florals for a Happy Card

Soft Layers & Florals for a Happy Card

Hello crafters! 

Today I’m sharing a bright, happy card created with some of my favourite Polkadoodles goodies. I reached for the Lily Vase Flower clear stamps, the Colour Create Stencil & Chipboard pack, and the Boho Petals 5 x Layering Emboss‑Ink Stencil Set. All the colour comes from Distress Oxide inks, blended and layered to build a soft, artsy background full of movement.


I started by creating the background using the Boho Petals layering stencil - the overlapping shapes add such a lovely flow and instantly bring the whole piece to life. On top of that I added a few subtle details from the Colour Create stencil and chipboard elements to give the card more depth and texture.

The focal point is the sweet watering can with flowers from the Lily Vase Flower stamp set. I coloured everything with Distress Oxides, keeping the palette fresh and uplifting. The sentiment Just be YOU felt perfect for this soft, encouraging design.

It’s one of those makes that comes together with joy - playful colours, layered stencils, and a simple but meaningful focal point. Thank you for stopping by. Natalia x

Layered Heart Card with the Boho Perfect Poppies Stencil Background  Polkadoodles Inspiration

Layered Heart Card with the Boho Perfect Poppies Stencil Background Polkadoodles Inspiration

 Hello and welcome back to my creative corner!

Today I’m sharing a card made with one of the backgrounds I created using the Boho Perfect Poppies x 3 Layering Emboss‑Ink Stencil Set from Polkadoodles. This stencil set has quickly become one of my favourites - the three separate layers (flowers, stems and leaves) make it so easy to build a full pattern and play with colour in endless ways.

For this card, I chose a bright red and blue background and paired it with a soft layered heart in the centre. I added a striped heart on top and finished everything with a clean black sentiment label. It’s a simple design, but the bold background really brings the whole card to life and makes the sentiment stand out beautifully.

If you’d like to see how this card came together, you can watch a quick YouTube Shorts video and a long video where I show the finished look and the background in action.

If you enjoy working with layered stencils or you’re looking for new background ideas, this set is such a fun one to experiment with. You can keep it simple with ink blending or try more textured techniques - every version looks completely different.

More cards using these backgrounds are coming soon, along with more Shorts showing each design.

Products used:
Boho Perfect Poppies x 3 Layering Emboss‑Ink Stencil Set - Polkadoodles

Thanks for stopping by today - see you in the next post!

Natalia

Mixed Media Altered Art on MDF Board with Floral Layers – Polkadoodles Inspiration

Mixed Media Altered Art on MDF Board with Floral Layers – Polkadoodles Inspiration

 Hello sunshine!

I’ve been playing with textures, layers, and a splash of bold color, and this mixed media piece is the result. It’s one of those projects where I just let the creativity flow and followed wherever the paints and papers took me.


The base is an MDF board, painted with acrylics to give it that rich, vibrant feel. I added some torn vintage papers and built up the background using Distress Oxide inks, spritzed with water for that dreamy, washed-out effect I love. The flowers and leafy fronds were inked and shaped to add movement, and the chipboard elements - especially the birdcage - got a mix of ink and alcohol markers to bring out their details.

I wanted this piece to feel joyful and full of life, so I layered everything up with lots of dimension and tucked in the “Hello sunshine” sentiment right in the heart of it all. It’s a little celebration of color and warmth.

If you’re curious about the products I used, here’s the list: 

– Altered Art MDF Board
– Lattice/Trellis Chipboard x 2 Pack
– Pretty Flower 1 dies
– Leafy Fronds dies
– Wild Sunshine Flowers A4 Chipboards Embellishment Sheet

You can enjoy a 10% discount at Polkadoodles using my code: NATALIAKUZAKNAT. Treat yourself to something creative!

Thanks for stopping by - hope this brings a little sunshine to your day!

Natalia x

Deck the Tags: Festive Texture and Bold Color with Polkadoodles

Deck the Tags: Festive Texture and Bold Color with Polkadoodles

Hello lovely crafters!

Today, I'm diving into the holiday spirit with two richly layered Christmas tags! I absolutely adore adding texture and dimension to festive projects, and these tags—created with wonderful supplies from Polkadoodles Crafts - are packed with both!


Polkadoodles Supplies Used:

  • Chipboard Tags: The perfect sturdy base for heavy mixed media work.
  • Dotty Poinsettia Flower Die Set: A must-have die set for creating magnificent, multi-layered flowers.
  • Hohoho text 6 x 8" Emboss-ink Stencil: Used to create bold, textured holiday lettering on the green tag.
  • Falala text 6 x 8" Emboss-ink Stencil: Used to add vibrant, fun texture to the blue tag.
  • Stencil Butter - Gold: The key to adding metallic shimmer and rich, dimensional detailing.


Building Textured Backgrounds

The background of these tags is where the magic starts!
Tag Shape: I started with the Chipboard Tags for a durable foundation.

Color Base: The tags were heavily treated with Distress Oxide Inks - deep greens and yellows for one, and vibrant blues and purples for the other. This created a rich, matte color base.

Texture and Shine: I used the Hohoho and Falala Emboss-ink Stencils with Stencil Butter in Gold to apply dimensional, shiny text directly onto the inked background. This instantly adds a festive, metallic relief that contrasts beautifully with the matte ink.

💖 The Star of the Show: Dotty Poinsettias & Die Cuts

No Christmas tag is complete without a beautiful poinsettia!

I used the Dotty Poinsettia Flower Die Set to cut and layer the petals. The petals were colored with a soft blend of inks - using the remaining Distress Oxide Inks for soft pink and green hues - to create that stunning, watercolor-like effect. The center of each flower features a luxurious gold bead to match the gold texture on the tags.

🌟 Layering and Finishing Touches

The secret to these mixed-media tags lies in the layering! I used various other dies (different shapes like foliage and labels) to add extra texture underneath the main flowers. Crucially, I incorporated MDF elements - like the layered star with the sentiment and the intricate snowflake - to provide structural depth and a solid festive theme.

These tags are ready to dress up any special holiday gift! I hope they inspire you to experiment with mixing dimensional paste, MDF elements, and ink blending on your next project.

Happy Holiday Crafting!

Natalia x
Forever Bloom: Creating a Dimensional Hoop Décor Piece with Polkadoodles

Forever Bloom: Creating a Dimensional Hoop Décor Piece with Polkadoodles

Hello everyone!

Today I'm thrilled to share a dimensional project that feels like a piece of perpetual spring! I've been playing with the fantastic Polkadoodles Embroidery Hoops & Easels Chipboard/MDF set, and the result is this richly layered, floral-themed décor piece. This project is a wonderful way to combine die-cutting and structural elements for a stunning dimensional effect.


The unique shape of this project comes from the Embroidery Hoops & Easels Chipboard/MDF set. This MDF base provides the perfect sturdy and stylish frame for heavy embellishment and detailed work.

The background inside the hoop is filled with soft, muted tones, providing a gentle canvas for the beautiful floral arrangements.

The main focus of this piece is the lush cluster of flowers and foliage. I used various dies - different flower shapes, delicate branches, and leaves - to create this abundant, multi-layered look. The use of various shades of pinks and soft greens creates a romantic, vintage feel.

To add the final touch of structural detail and charm, I incorporated the small MDF buttons that were included with the set. These little details give the piece a lovely, finished, and personalized touch, tying the whole composition together.

This dimensional hoop project is a testament to how effectively Polkadoodles MDF elements work as a frame for detailed die-cutting! I hope this project inspires you to look beyond traditional card shapes for your next creation.

Happy Crafting!

Natalia x
Luxe Black & Gold: Transforming Chipboard with Distress Oxide on a Polkadoodles Peony Card

Luxe Black & Gold: Transforming Chipboard with Distress Oxide on a Polkadoodles Peony Card

Hello creative souls!

Today I have a project for you where I combined the elegance of a deep black background with the luxurious shine of gold to create a card perfect for any special occasion. The focal point, of course, is the wonderful collection of products from Peony Bloom & Grow by Polkadoodles Crafts!


 Products I Used:

  • Peony Flowers A4 Chipboard Embellishment Sheet: These chipboard elements are fantastic for building layers and adding dimension. I used the leaves to create a rich, golden frame around my peonies.
  • Peony Bloom and Grow Flowers Colour & Create Stencil: Essential for creating textured, layered backgrounds.
  • Peony Bloom & Grow Clear Stamps: Gorgeous floral motifs perfect for coloring and fussy cutting.


How the Magical Background was Created:

Deep Night: The card base was covered with a rich, black ink or cardstock, creating a dramatic background.

Stardust: To add depth, I used white paint (acrylic or highly pigmented ink) in a 'splatter' technique, which created a gorgeous starry night effect.

Gold Heat Embossing: This is the key to the shine! The outline of the leaves and branches on the black background was created using the heat embossing technique. I stamped with clear embossing ink, then covered it with rich gold embossing powder and set it with a heat tool. I also used the gold pen to decorate the edges of the card.

💖 Peonies in Pink and Gold

The floral motifs from the Peony Bloom & Grow clear stamp set were stamped onto separate paper and then colored in vibrant shades of pink.

🔥 The Secrets of the Golden Chipboards: 
I first inked the leaves from the Peony Flowers Chipboard Embellishment Sheet and covered them with the gold embossing powder. Then, to add subtle shadow and depth, I carefully applied a few shades of Distress Oxide Inks! These inks blend beautifully on chipboard, achieving an effect of metallic shine combined with watercolor depth. I mounted them with foam pads for extra dimension.

The finished peonies and leaves were arranged on the dark background. The whole piece was completed with a few pink enamel dots and the contrasting black sentiment, "YOU'RE JUST EVERYTHING."

I hope you enjoyed my inspiration! Polkadoodles products are made to be combined, offering endless creative possibilities.

Let me know in the comments what your favorite color is to combine with gold!

Have a great day and see you in the next post!

Natalia x
A Vase Full of Sunshine: Slimline Card using Distress Inks and Chipboard

A Vase Full of Sunshine: Slimline Card using Distress Inks and Chipboard

Hello Creative Souls!

Today I have a project for you that combines my love for layers, intense colors, and the fascinating world of mixed media. I created a slimline card, perfect for welcoming spring or sending an "Oh Happy Day" wish!


To create this piece, I used some of my favorite products from Polkadoodles Crafts.

Here’s the list of what I used:
  • Stamps and Stencils: Lily Vase Flower clear stamps, Colour Create Stencil & Chipboard pack (the perfect trio!)
  • Background Texture: Knit texture A5/6 x 8" Emboss-ink Stencil
  • Color Mediums: Distress Oxide ink (for coloring) and classic Distress Inks (for the background).

How I Did It: Step-by-Step Creation Process

1. The Star of the Show: Flowers on Chipboard

Instead of stamping onto traditional watercolor paper, I stamped the Lily Vase Flower motif directly onto the chipboard included in the pack.

This was a key decision! The stiffer surface of the chipboard provided an incredible base for the Distress Oxide inks. Coloring on chipboard allows for beautiful, saturated colors and soft transitions (thanks to the ink's reactivity with water), and the element itself is already sturdy and ready to be mounted with 3D foam.
I chose warm tones, transitioning from sunny yellow to deep pink/red.

2. Textured, Layered Background

I wanted the background to be just as interesting as the central motif, so I used the "faux embossing" technique with a stencil.
On light paper, I applied various shades of Distress Inks in vertical stripes (yellows, turquoises, blues).
Then, instead of painting through the Knit texture A5/6 x 8" Emboss-ink Stencil, I used it as an embossing folder. This meant I simply ran the paper with the stencil through my die-cutting machine, which pressed the pattern into the paper and created an amazing knitted texture. This is my favorite trick for a quick and deep background!
Finally, I layered the textured piece onto dense, dark blue cardstock, adding machine stitching for an extra handcrafted feel.

3. Finishing Touches

I mounted the chipboard vase and flowers, which were colored beautifully, using foam tape for dimension. I added the sentiment "Oh Happy Day" on a black strip to make it pop against the colorful flowers, and finished the card with a few enamel dots in the lower section.

💖 Your Turn!

I hope this project inspires you to try coloring with Distress Oxide inks on chipboard and experimenting with stencils as embossing folders.

Let me know in the comments what your favorite tricks are for creating textured backgrounds!

Hugs, Natalia
 A Touch of Spring Magic – Soft Backgrounds and Delicate Details

A Touch of Spring Magic – Soft Backgrounds and Delicate Details

 Hello friends!

I’m so happy to share today’s cheerful duo of spring cards created with a blend of soft textures, fresh colors, and subtle detail work. These cards are full of sunny vibes and a perfect way to say hello or send a little joy.


For both projects, I used the Switchables Circles Stencil & Masks II from Polkadoodles. In the pink-orange card, I ink-blended with Distress Oxides and added soft white pigment ink through the stencil for a dreamy layered effect. The second card has a bold blue background with the same stencil, this time embossed with clear powder for a lovely raised texture.

Card features:
A delicate chipboard focal point
A crisp stamp from the Hello Sketchy Flower set by Polkadoodles
Gentle blending and layering to add warmth and depth

I love how simple elements can create something so uplifting. These cards remind me that small touches – a kind word, a handmade card – can brighten someone’s day. 

Thanks for stopping by – I hope this brings a little spring to your creative table!

With warm hugs,
Natalia

Springtime Elegance – Soft Stenciled Background & Embossed Details

Springtime Elegance – Soft Stenciled Background & Embossed Details

 Hello, Spring! 

Spring is finally here, bringing soft pastels, blooming flowers, and fresh inspiration! Today, I’m sharing a delicate and elegant card that captures the essence of this beautiful season.


For the background, I used the Switchables Squares & Rectangles stencil from Polkadoodles, blending it with Distress Oxide inks to create a soft ombré effect. This subtle geometric design adds depth while keeping the focus on the central elements.

The main feature of this card is the stunning chipboard branch, which I heat-embossed in white for a crisp, textured look. It beautifully complements the layered "hello" sentiment, making it a perfect card to send warm wishes to someone special.

Supplies Used:

Stencil: Switchables Squares & Rectangles – Polkadoodles
Background: Distress Oxide inks
Chipboard: Heat-embossed in white

I love how versatile this design is—you can easily switch up the colors for a completely different look! Do you enjoy working with stencils in your projects? Let me know in the comments!

Happy crafting! 💕

Smile Mini Album – Sweet Moments Collection

Smile Mini Album – Sweet Moments Collection

 Hello, everyone!

Today, I want to share my latest creation—a cheerful camera-shaped mini album inspired by the Hello It’s Me stamp and beautiful chipboards from the Sweet Moments collection. This project was so much fun to create, and I hope it inspires you to make your own colorful and unique memories!


For this mini album, I used alcohol markers to color the adorable stamped elements, which added vibrant details and brought the designs to life. The camera-shaped base and chipboards were enhanced with Distress Oxide inks, creating smooth textures and soft gradients that give the project a polished and cohesive look. To make the album even more special, I included decorative ribbons and interactive elements, which make flipping through the pages playful and dynamic. Each page features a unique design and message, like "Today is the perfect day to be happy" or "Make Memories," making it a perfect way to preserve snapshots of happy moments.

Thank you for stopping by!

Hello It’s Me – Mixed Media Inspiration with Polkadoodles

Hello It’s Me – Mixed Media Inspiration with Polkadoodles

Hello All crafters :)

Today, I’m excited to share my latest creation made for Polkadoodles! This project is full of charm and vibrant details, featuring the adorable Hello It’s Me stamp and chipboards from the Sweet Moments collection. The background paper comes from the beautiful Devine Hearts collection, perfectly ties all the elements together.


Creative process

The focal point of this design is the sweet bear in the frame stamp, which I colored using alcohol markers for a soft and playful look. To complement this, I used Distress Oxides to add color and texture to the chipboards. These include filmstrips, arrows, Polaroid frames, paper clips, and a rosette, which brings depth and dimension to the composition.

Techniques and details

  • Stamp Coloring: The bear was stamped and meticulously colored with alcohol markers to bring it to life.
  • Chipboards: I added extra personality to the chipboards with Distress Oxides, layering the colors for a distressed yet harmonious effect.
  • Background: The subtle yet intricate background paper from Devine Hearts creates the perfect canvas for all the elements.
  • Dimension: Layering and arranging the elements, including the rosette, adds depth and creates a visually interesting design.

This mixed-media project was a joy to create and a fantastic way to highlight the versatility of Polkadoodles products. I hope it inspires you to experiment with layering, coloring, and chipboards in your own crafting!

Let me know what you think in the comments below, and don’t forget to tag me if you recreate something similar.


Happy crafting!

Natalia 


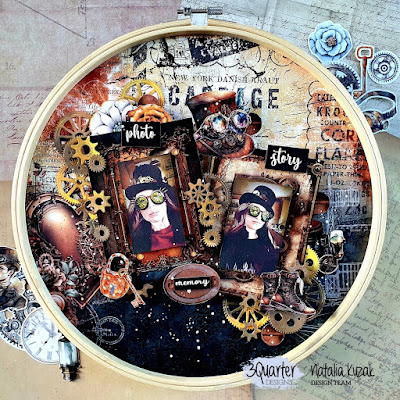
Memory - wooden hoop

Memory - wooden hoop

Hello,

Today I want to present my LO on a wooden hoop using papers from the "Invention Age" collection by 3Quarter Designs. These steampunk atmospheres, which I really like, made working on them a pure pleasure. This collection has many patterns, from motif papers to plain ones, so everyone will find something for themselves. And let's not forget the fantastic chipboard embellishments that add an extra dimension to the piece. Wishing you all a wonderfully creative evening.


Thank you!


Happy Anniversary - card

Happy Anniversary - card

 Welcome to the New Year!

Today, I would like to show you one of my wedding anniversary cards in beautiful shades of royal blue. I used papers from 3Quarter Designs.


Thank you for stopping by!


Perfection - triple tags

Perfection - triple tags

Hi,

Today, I'm excited to share something exceptional from the Peaceful Illusions collection by 3Quarter Design.
It's a set of three delightful tags adorned with inscriptions.
This collection features beautiful papers and cut-outs, including mushrooms, flowers, birds, and butterflies. Truly remarkable!


let's share love everywhere!


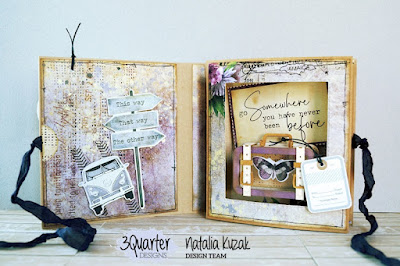
Go somewhere you have never been before - card

Go somewhere you have never been before - card

 Hello,

Today I have some exciting news to share, I'm part of the 3Quarter Designs team from New Zealand. 

I'm so happy! The new adventure, new papers which I've never used before... What can I say.... they are gorgeous!

So, I made a card for someone who loves traveling near and far. It is made in the style of a shadow box where I placed a small suitcase and sentence. I put a butterfly in the suitcase, which is supposed to symbolize freedom and happiness, because what else is traveling? On the back cover is a funny van that can't decide where to go.

On the cover I put the inscription: Adventure is always worth it ... which is true, isn't it? And those who do not travel only read one page in the book, as the quote on the back of the page, says.


Hope you like my first inspiration for 3Quartes Designs.
Copyright © Natalia Kuzak Art , Blogger